
NSF PERSONNEL DOCUMENT GUIDE & RESOURCES
Step by Step Instructions - How to Use SciENcv
Create Your My NCBI Account
My NCBI is a tool, originally created by the National Institutes of Health (NIH) that retains user information and database preferences to provide customized services for many NCBI (National Center for Biotechnology Information) databases. Its SciENcv application helps you create online professional profiles that can be made public to share with others.
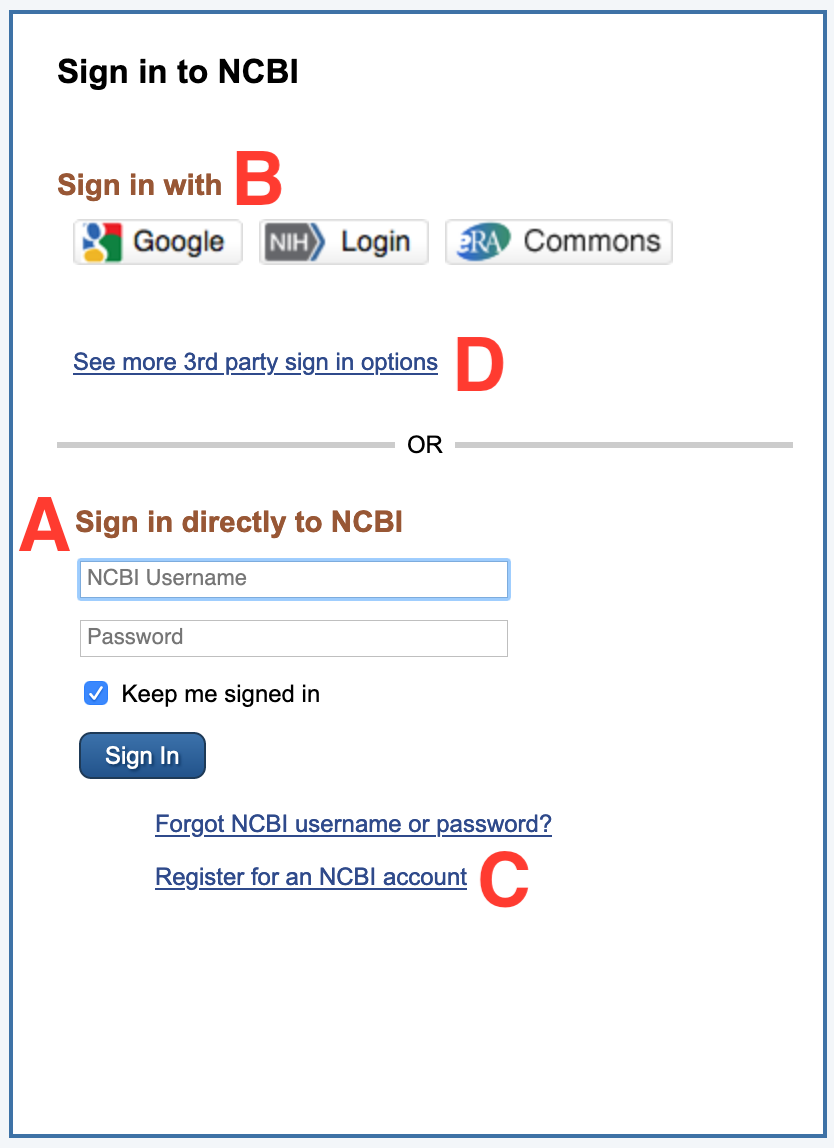
Go to https://www.ncbi.nlm.nih.gov/myncbi/ to create an account or sign in to an already existing My NCBI account (see A in Figure 1). You can sign in with Google, eRA Commons, or with your already exisiting NIH Login information (see B in Figure 1) or you can use a 3rd party option like the National Science Foundation (NSF) (see D in Figure 1). An alternative that will allow the most direct access to the system, but does not include any links to already established eRA Commons or PubMed accounts is to Register for an NCBI Account (see C in Figure 1).
Link Your ORCiD ID Account
The ORCID (Open Researcher and Contributor ID) is a nonproprietary alphanumeric code to uniquely identify scientific and other academic authors and contributors. It can automatically track publications that have been associated with your ORCiD ID, keep track of professional preparation and professional appointments, as well as provide an online representation of your accomplishments. This is not required, but your ORCiD account can also be linked to your My NCBI account to pull relevant information into your SciENcv created biosketches.
You can link your ORCiD account either by accessing your Manage SciENcv at the bottom right corner of your My NCBI landing page (see Figure 2) or by changing your account settings at the top of right corner of your My NCBI landing page (see Figure 3).
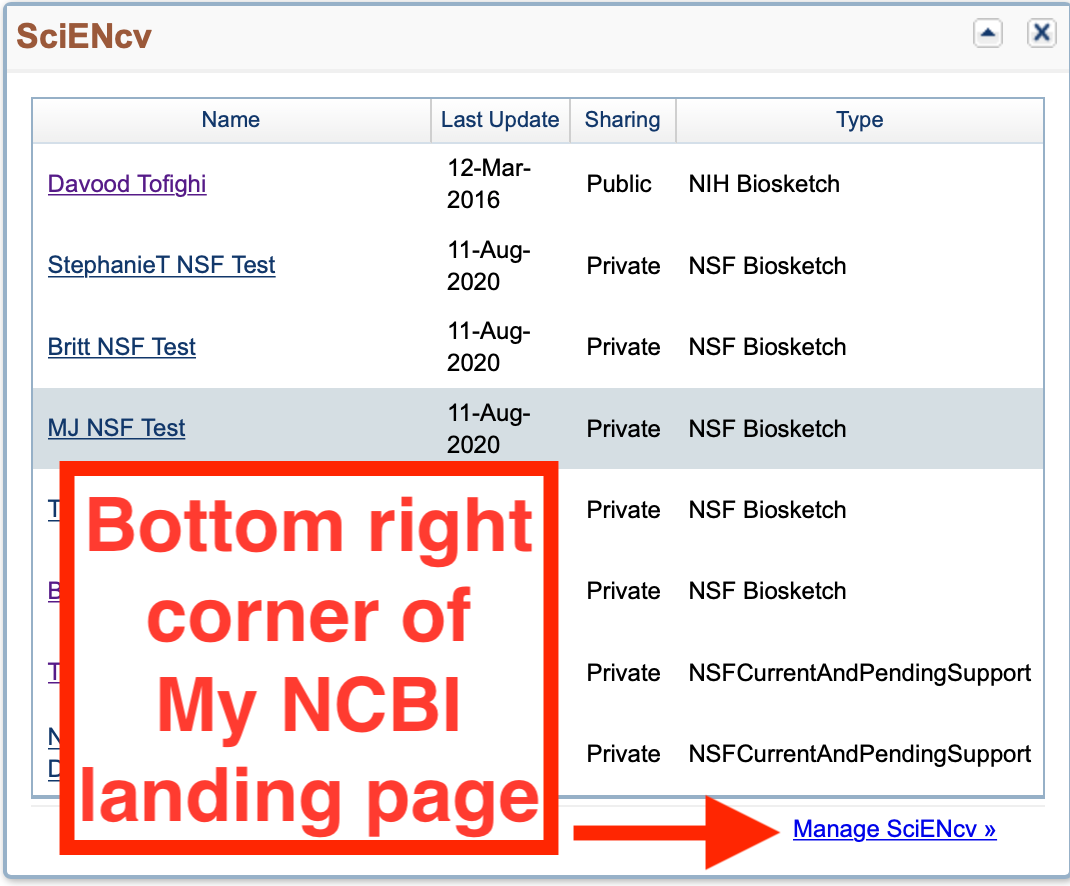
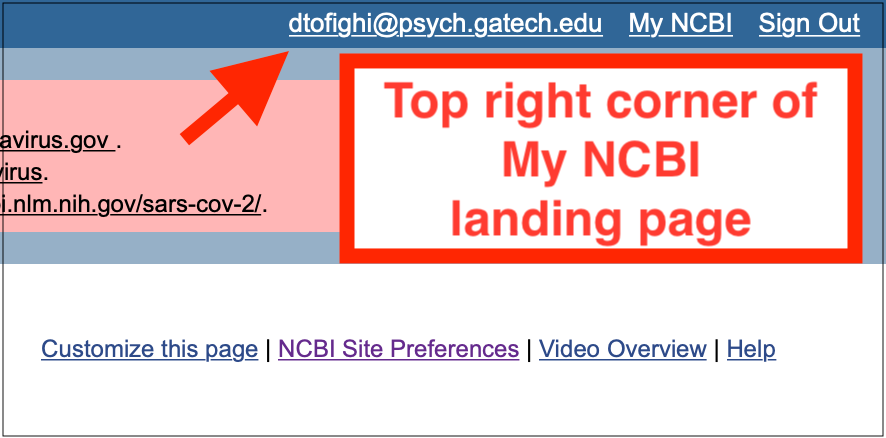
Figure 2: Access Manage SciENcv to Link ORCiD Account Figure 3: Access Account Settings to Link ORCiD Account
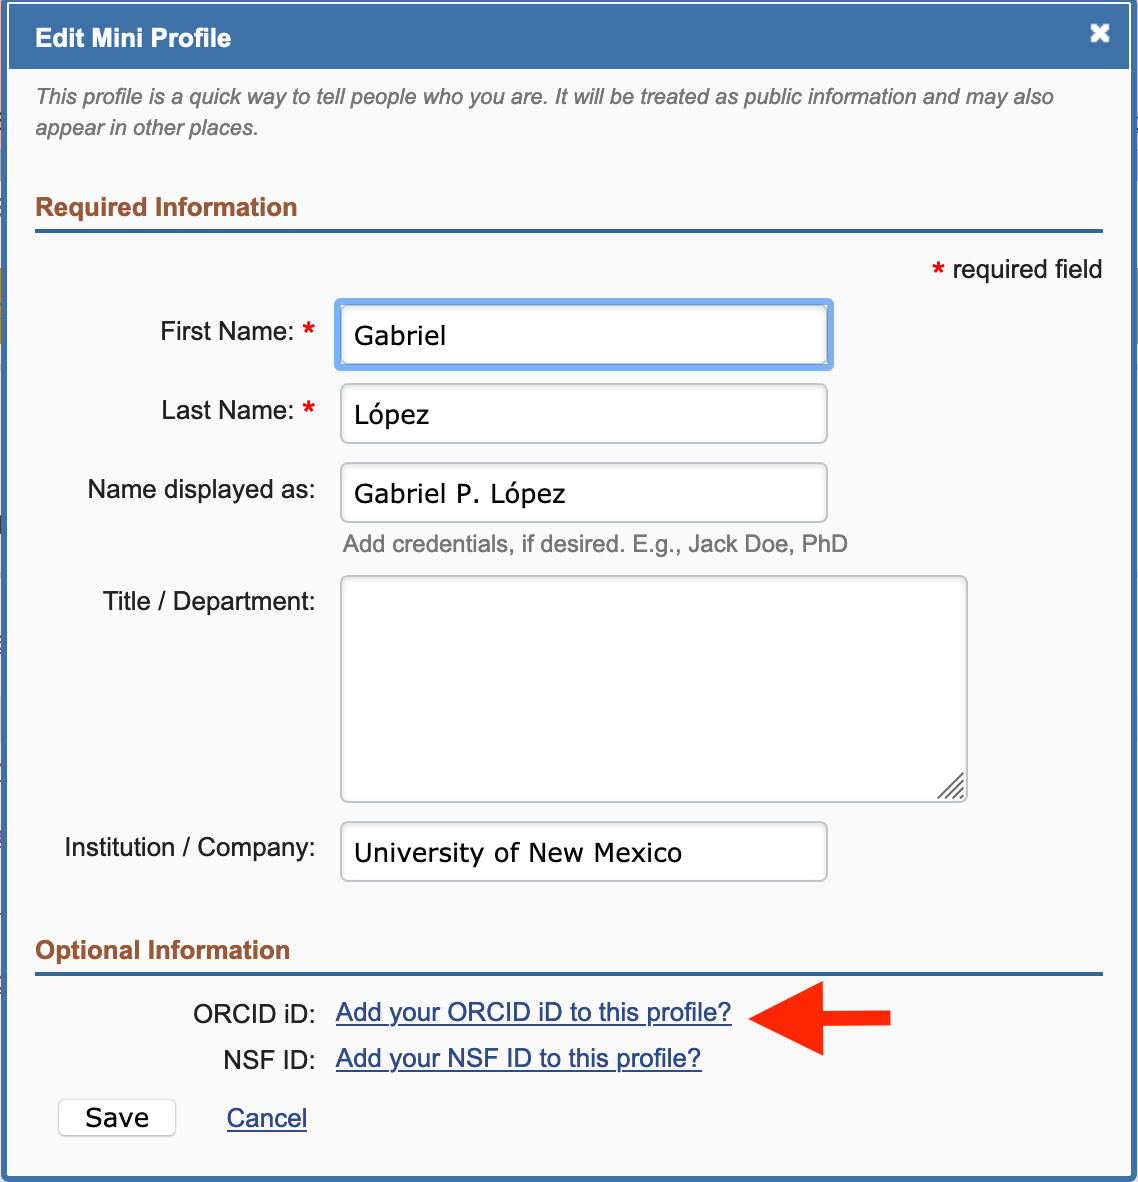
If you use the Manage SciENcv option in Figure 2, you'll now need to access the mini-profile box in the upper middle of the SciENcv landing page in Figure 4 and then add your ORCiD ID by clicking the link Add your ORCID iD to this profile? in Figure 5. Clicking that link will direct you to log into your ORCiD account. Once you're logged in, you will be brought back to My NCBI.
Once your ORCiD ID is linked to your SciENcv account, you'll be able to access whatever information you have available on your ORCiD account whether that is publications (see Figure 6) that can be added the products section of the biosketch or professional experience (see Figure 7) that can be used to fill a new biosketch document.
Manage Your SciENcv
Create new documents (biosketch or current and pending) by accessing the Manage Your SciENcv option at the bottom right corner of the My NCBI landing page (see Figure 2). Some users may have the option to Create New CV instead, but it will be in the same location regardless. To create a new document, select Create New Document (see Figure 8).

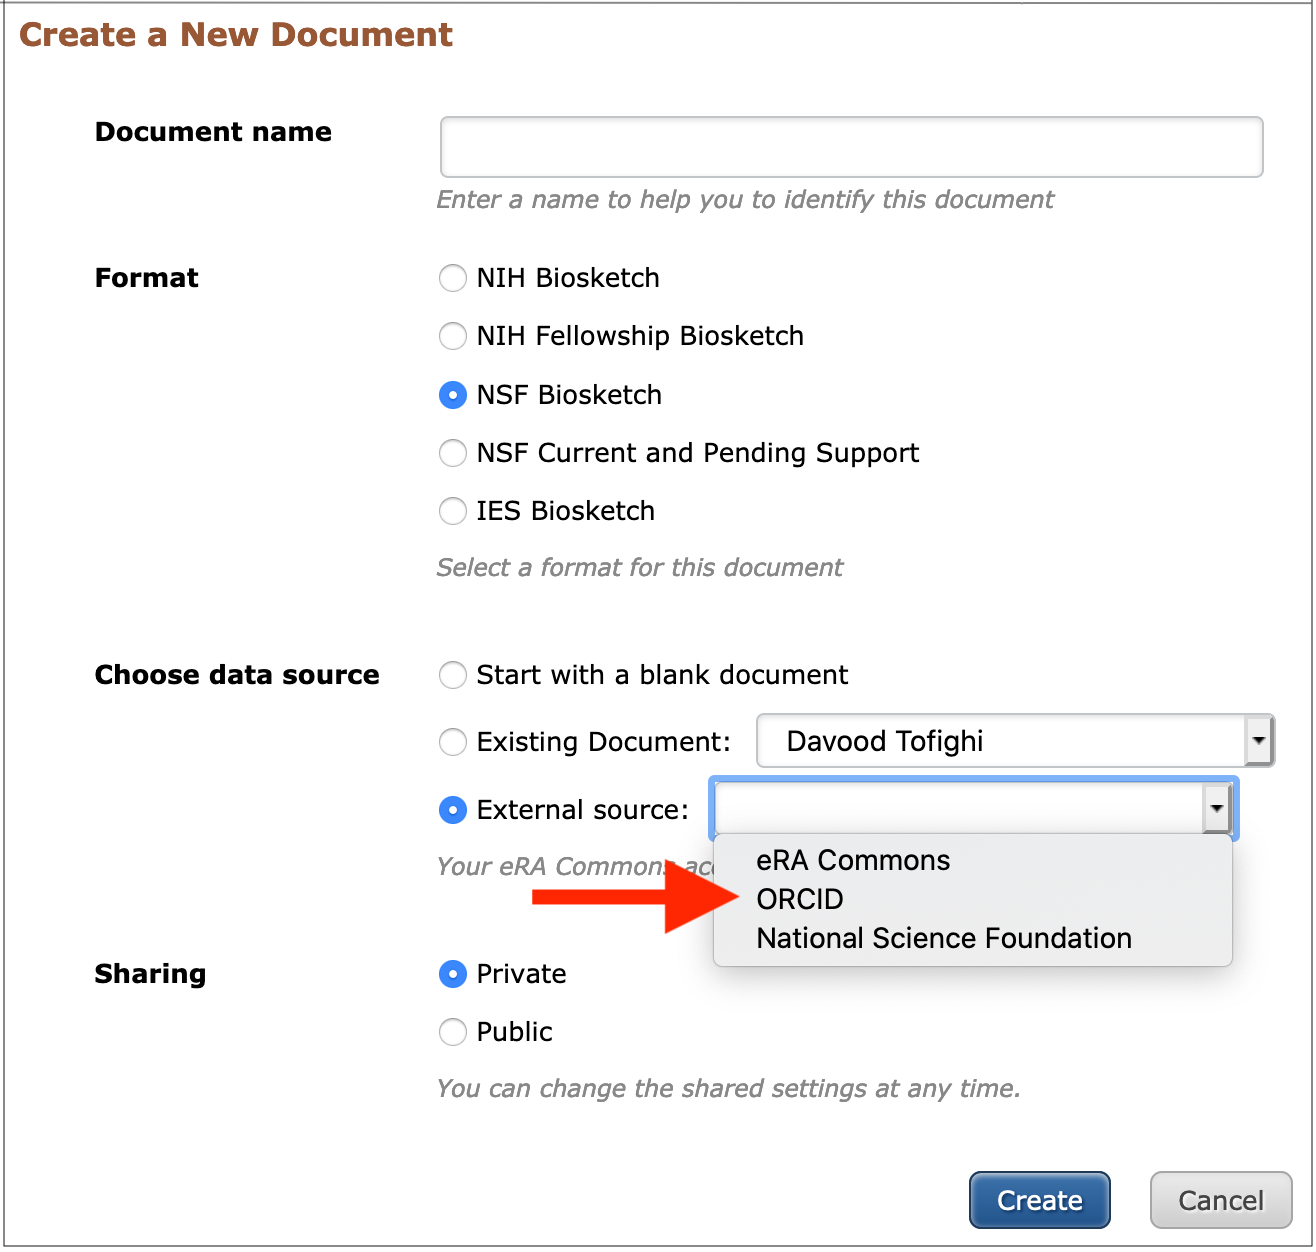
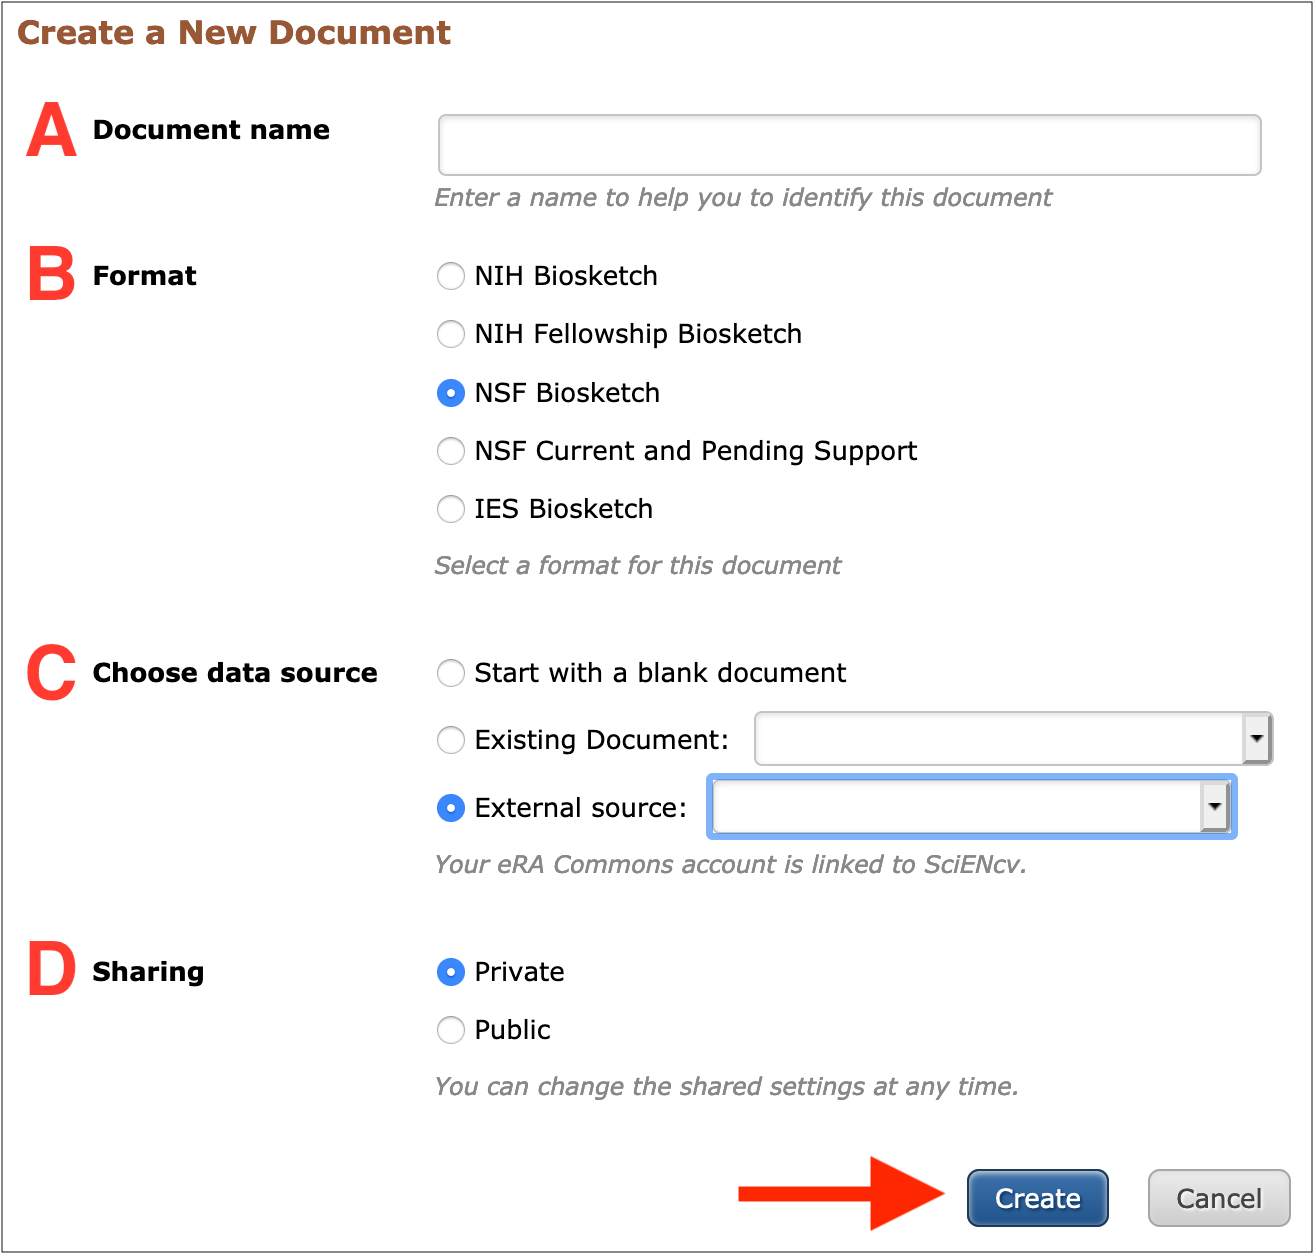
Add a Name (see A in Figure 9), select the Format (see B in Figure 9), choose the Data Source (see C in Figure 9), decide whether to make it public with a url or keep it private (see D in Figure 9) and then click Create.
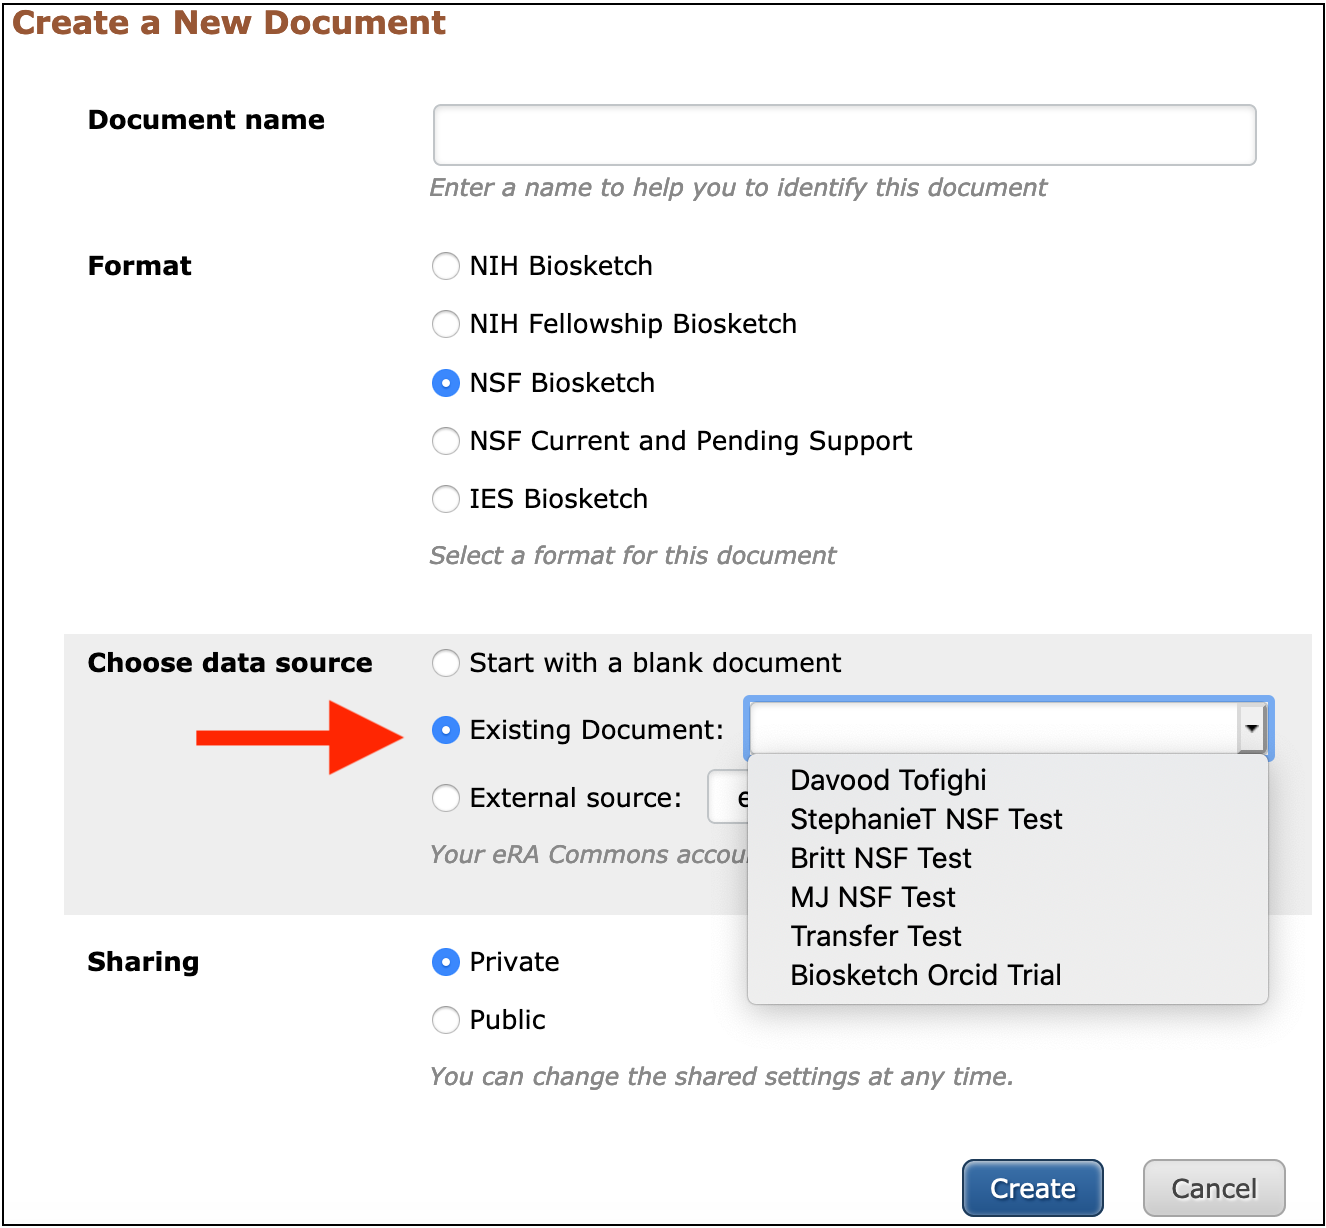
Once you've already got documents (biosketches or current and pending) from any format already saved in your SciENcv account, you can then use them as existing documents when choosing the data source for a new document (see Figure 10).
- A. Professional Preparation
- B. Appointments
- C. Products
- D. Synergistic Activities
- Downloading Biosketch PDF
A. Adding Professional Preparation
Under "professional preparation," enter your academic degrees and training, in chronological order, using the degree and training radio buttons. Each entry window has a different set of choices (see Figure 1).
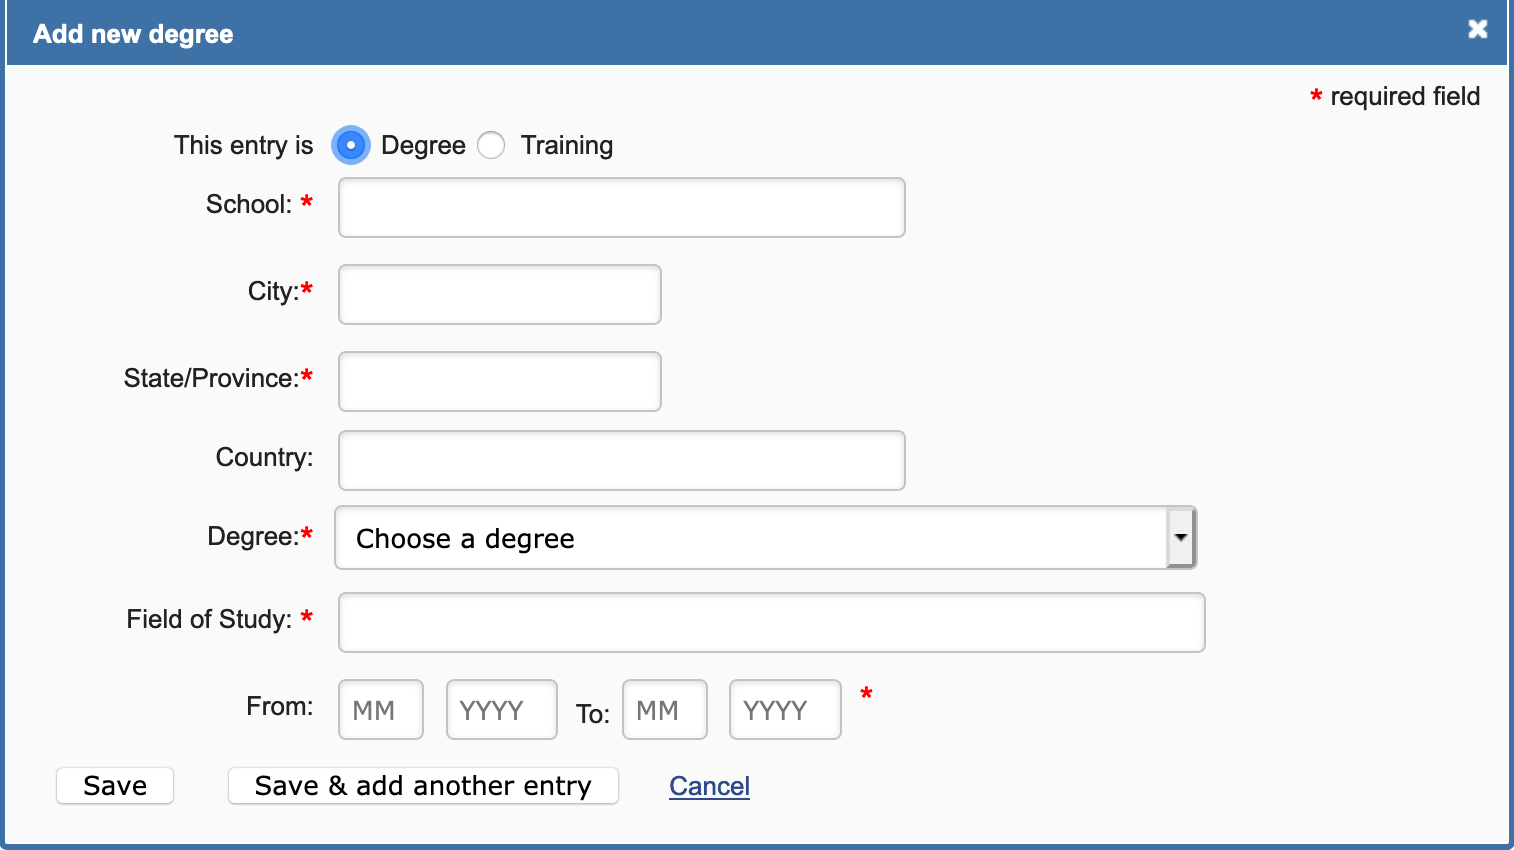
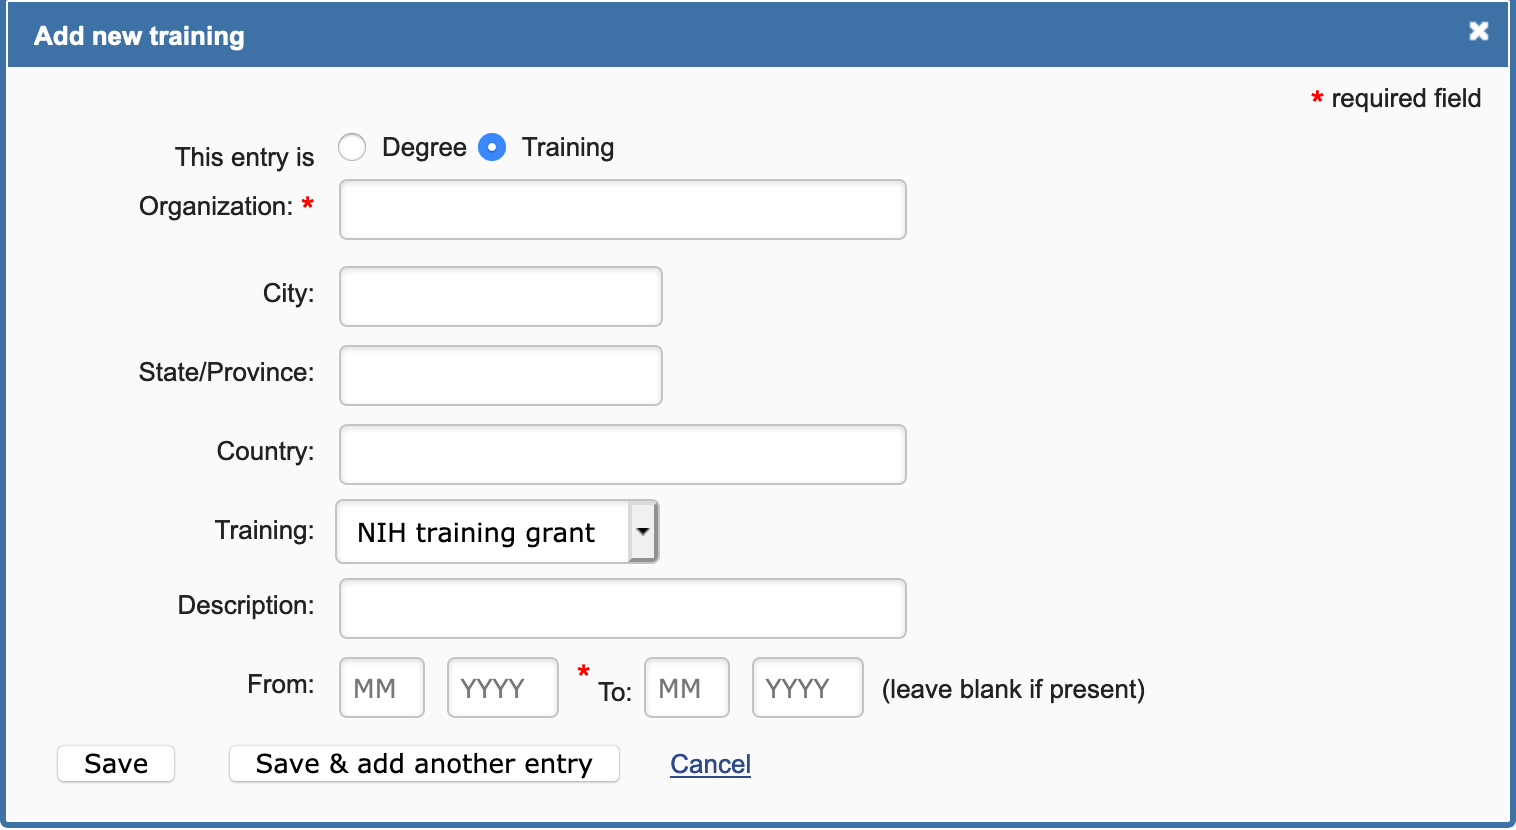
Figure 1: Adding Degrees and Training to the NSF biosketch.
To edit or delete an entry, hover your mouse over the selected degree or training and select either "delete" or "edit" (see A in Figure 2). If you want to download or share your profile, but only want selective content to be displayed, click "Show/hide entries" (see B in Figure 2). Next, uncheck the checkbox next to the entry you would like to hide, and click "Done" (see Figure 3).

Figure 2: Delete or Edit entries in Professional Preparation.

B. Listing Appointments
List professional appointments in reverse chronological order using the "Add Employment" window (see Figure 4). To indicate your principal professional appointment for the NSF biographical sketch, be sure to check the box next to "Use this entry as the position title and current employment."

To edit or delete an entry, hover your mouse over the selected entry and click either "delete" or "edit" (see A in Figure 5). If you want to download or share your profile, but only want selective content to be displayed, click "Show/hide entries" (see B in Figure 5). Uncheck the checkbox next to the entry you would like to hide, and click "Done" (see Figure 6).

Figure 5: Delete or Edit Employment in Appointments.

Figure 6: Display or Hide Entries in Appointments.
C. Adding Products
The Products section of the NSF biographical sketch displays citable and accessible publications, data sets, software, patents and copyrights. This section uses My Bibliography to manage products information, and it consists of two parts:
- Products most closely related to the proposed project (see A in Figure 7), where you may add up five products that are most closely related to the proposed project.
- Other significant products (see B in Figure 7), where you may add up five products that are significant, whether or not related to the proposed project. Click "Select Citations" (see Figure 7) to add products from your My Bibliography collection (see B in Figure 8), or if not found there, to add citations (see A in Figure 8) for your products (see Creating a bibliography) (see Figure 8). Products can also be added from an externally linked source e.g. your ORCiD ID Account (see Figure 9).

Figure 7: Add Products to NSF Biosketch.

Figure 8: Add Products using My Bibliography.

Figure 9: Add Products using an Externally Linked Account like ORCiD.
D. Adding Synergistic Activities
In the Synergistic Activities section of the NSF biographical sketch list up to five examples that illustrate the impact of your professional or scholarly activities and their focus on the integration and transfer of knowledge. Click "Add another entry," enter each activity in the "Add/Edit Synergistic activity" window and click "Save" (see Figure 10). Text can be simply formatted using the markdown syntax available by clicking the green triangle at the bottom left-hand corner of the Add/Edit Synergistic activity.

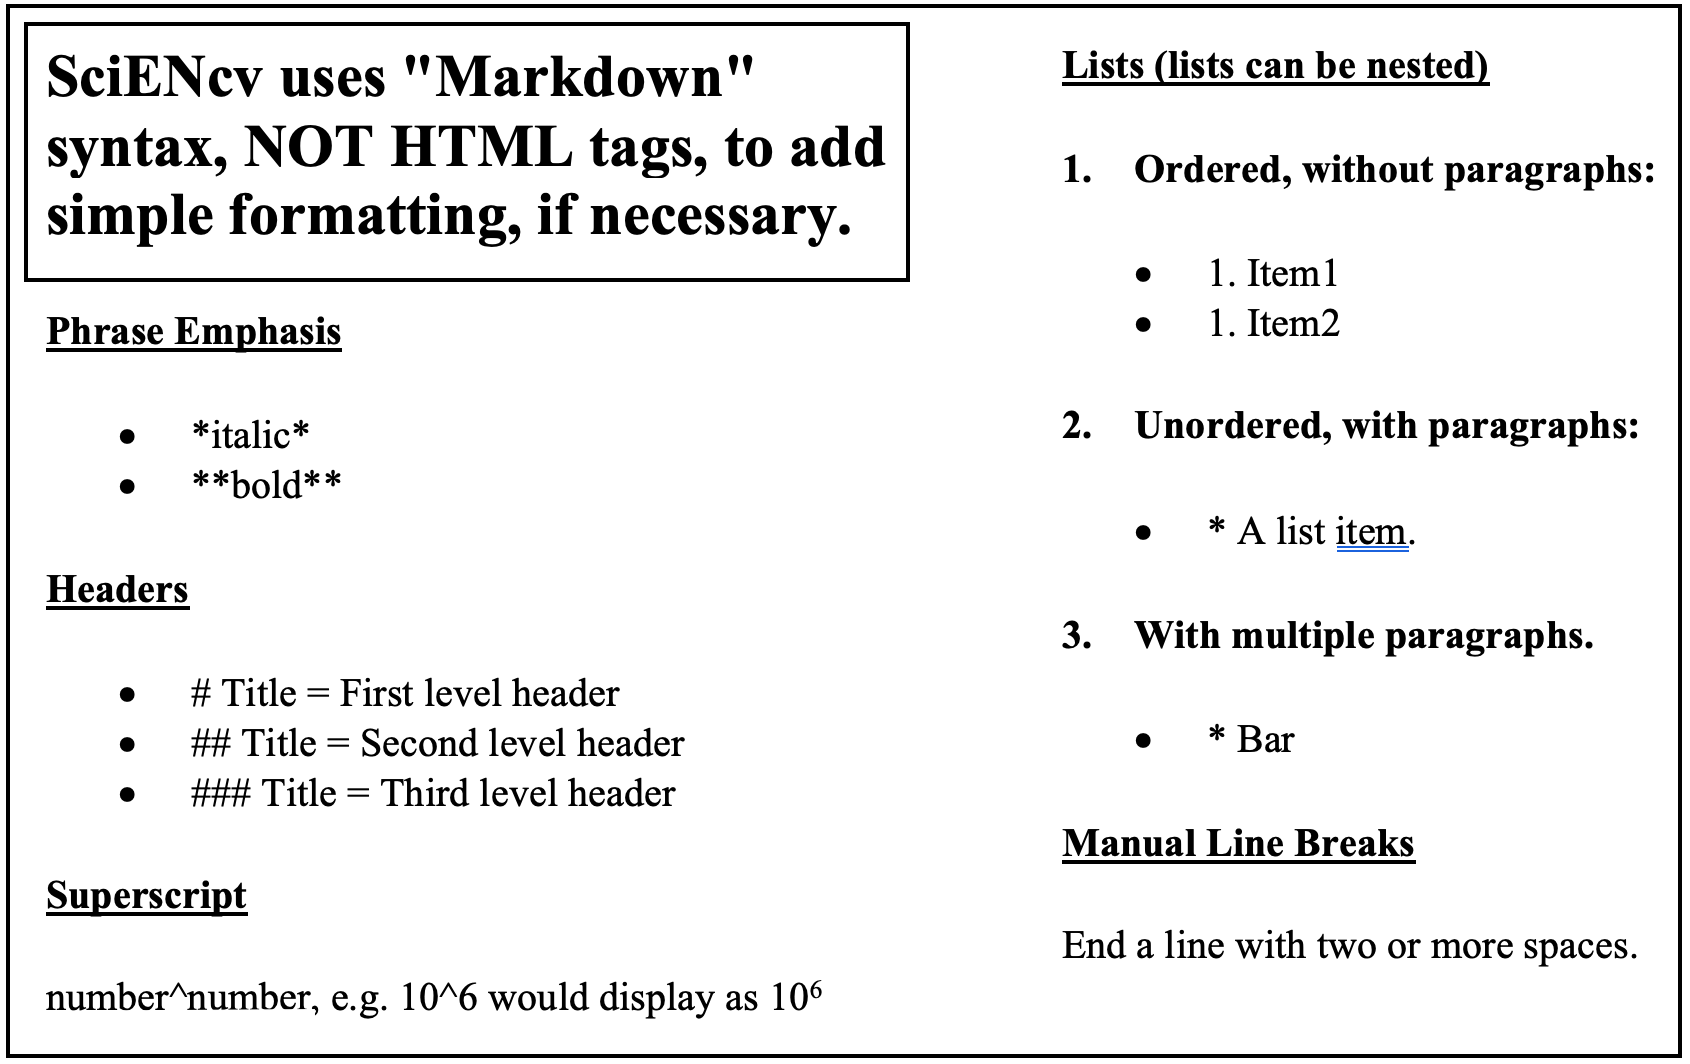
Figure 10: Add/Edit synergistic activity window.
To reorganize the order of your listed synergistic activities, or to delete or edit an entry, hover your mouse next to the selected entry and click "Move up," "Move down," "Delete," or "Edit" (see Figure 11).

Figure 11: Move order, delete or edit Synergistic Activities.
Downloading Biosketch PDF
When you are finished inputting all the necessary information into your biosketch, download it by either clicking the PDF option at the top (see Figure 12) or the bottom of the formatting page. If the document exceeds the three page limit, you will need to make adjustments to the information included either by condensing synergistic activities, abbreviating names and locations, or not including all authors in the publications.

Create new Current and Pending Support Documents using the Manage SciENcv or Create New CV option at the bottom right corner of the My NCBI landing page (see Figure 1). Click Create New Document to open formatting page. Make sure to choose NSF Current and Pending Support formatting option and either Start with a Blank Document or select an Existing Document (see A in Figure 2) if you already have a current and pending document in your SciENcv account.
Figure 1: Manage SciENcv to Access Create New Document
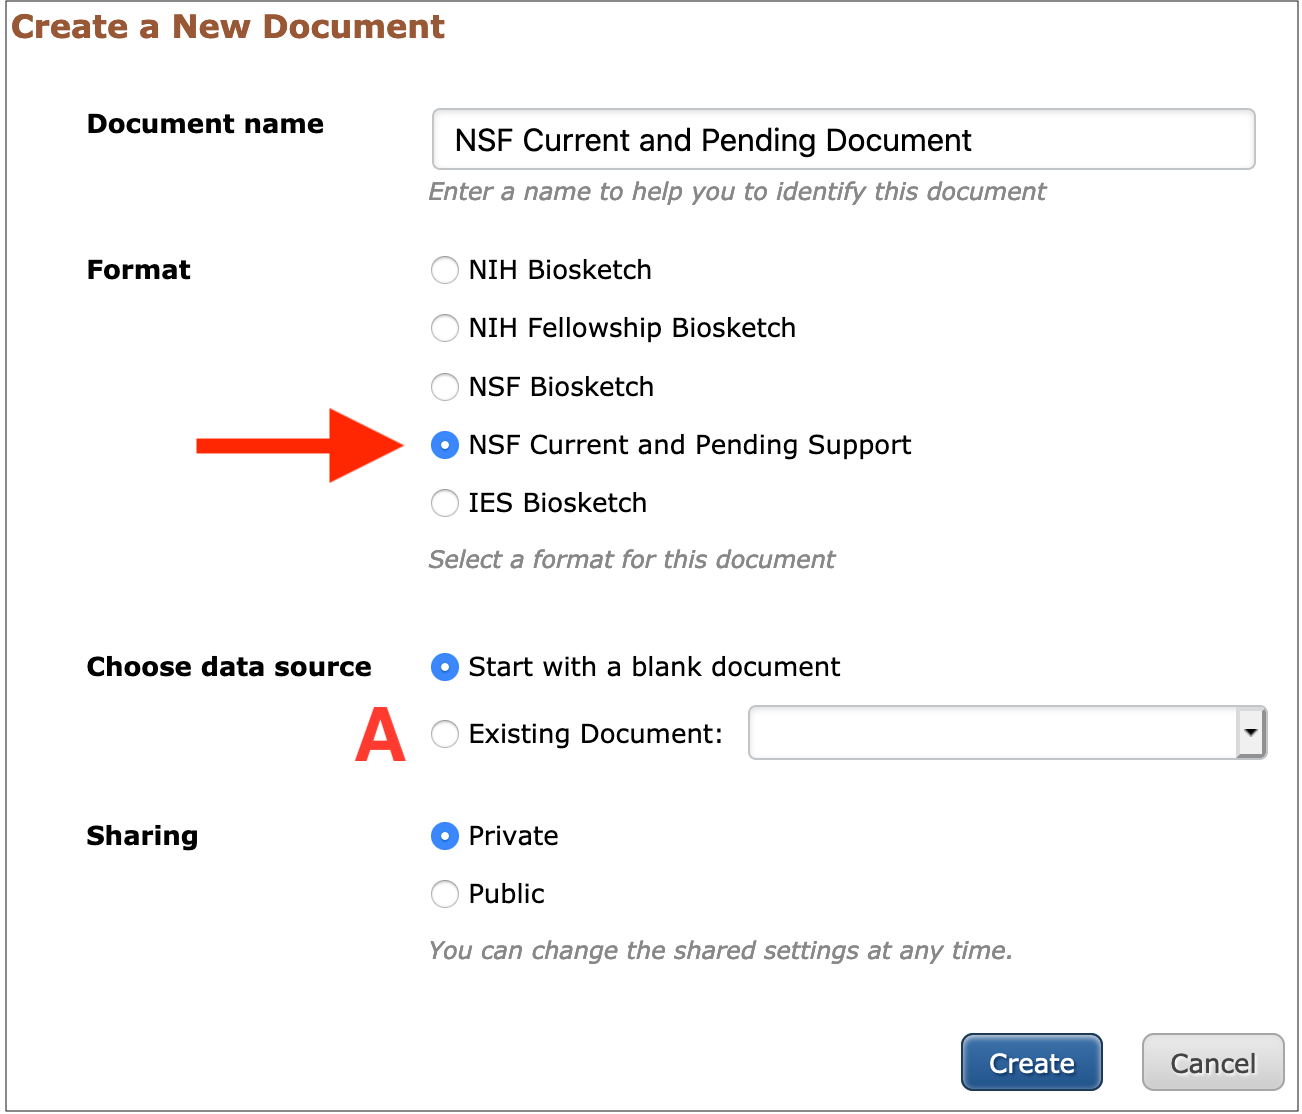
Figure 2: Create New Current and Pending Document
You'll be able to include both Current and Pending Proposal and Project (see A in Figure 3) and In-Kind Contributions (see B in Figure 3). Make sure to read the directions thoroughly to effectively include all required information.
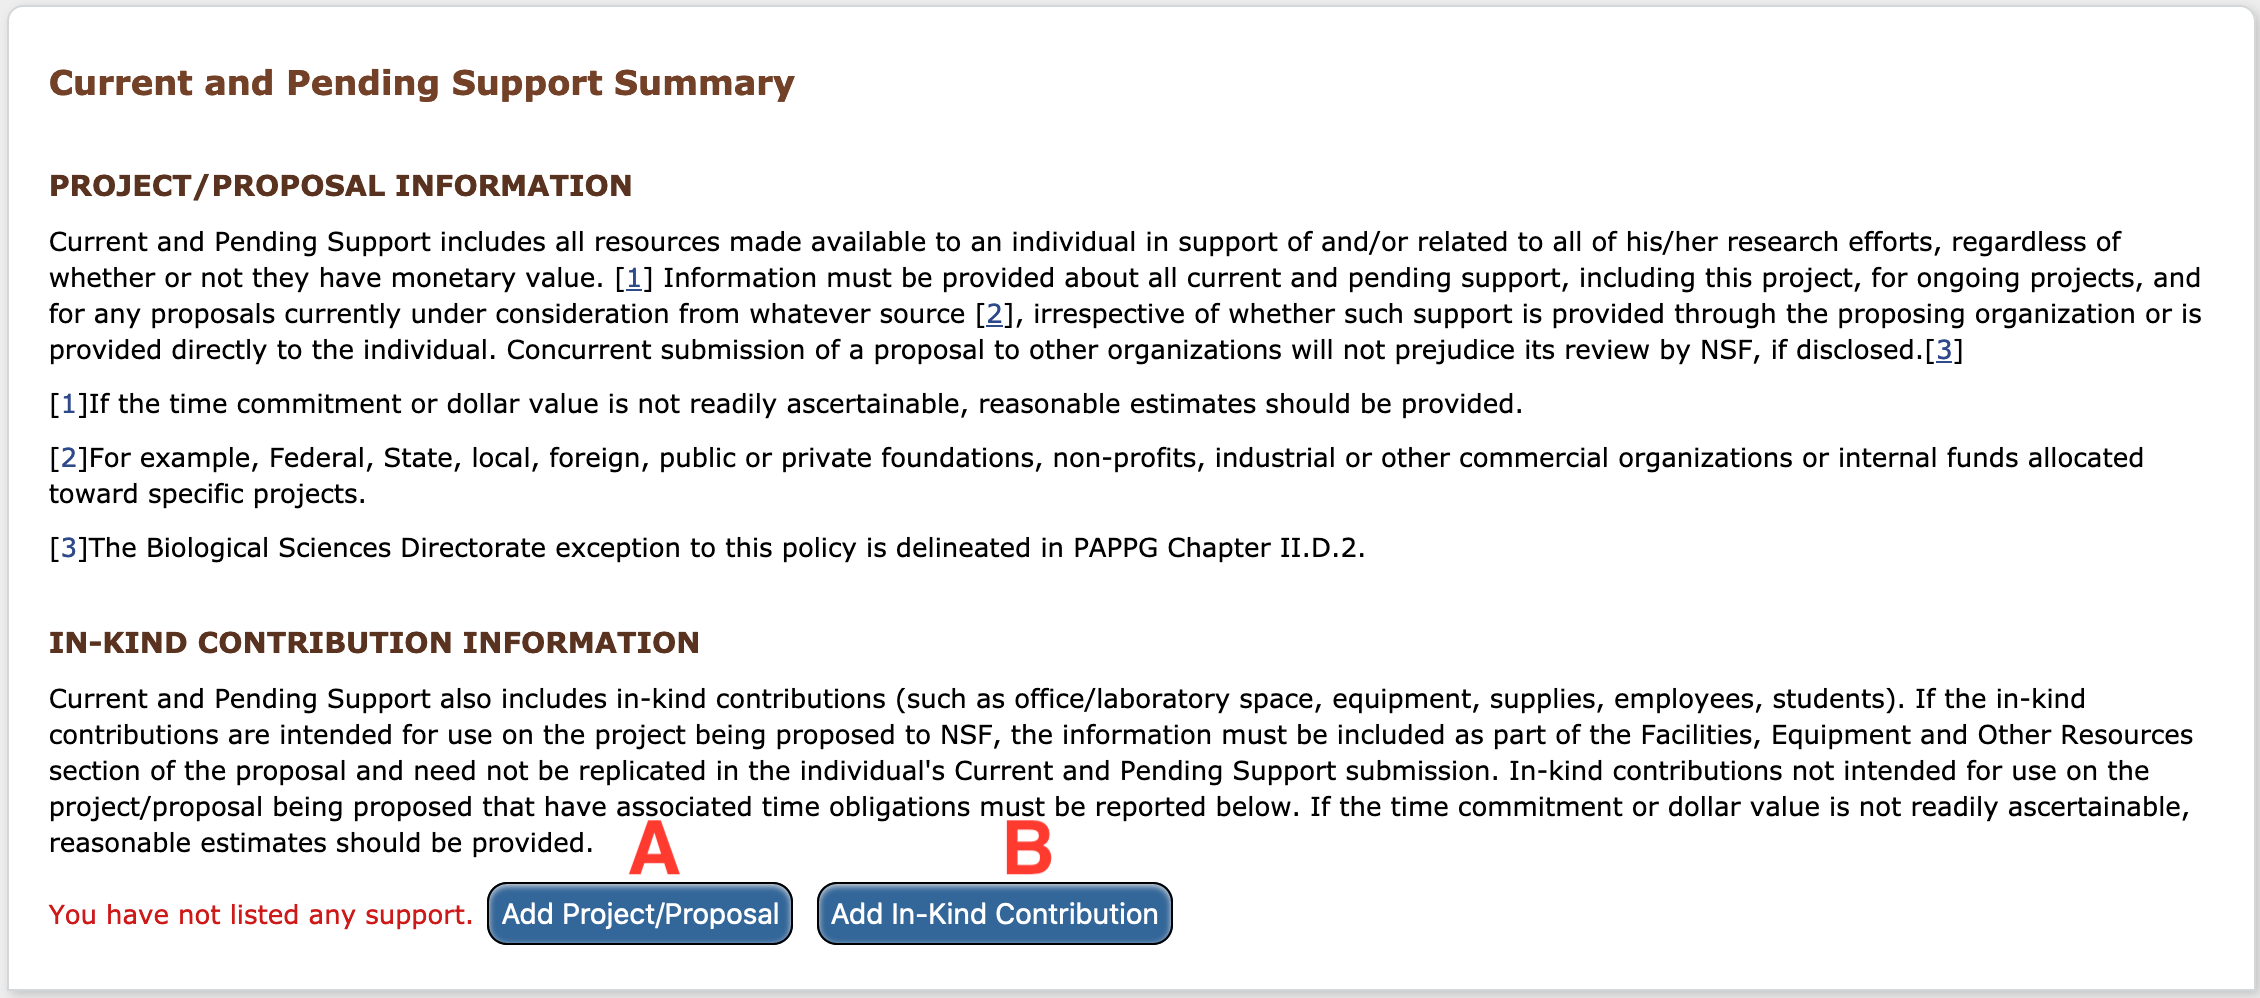
Figure 3: Select Current and Pending Options
The Current and Pending Proposal/Project Support document (see Figure 4) is reflective of past NSF templates. Make sure to add effort to all relevant years of the project.
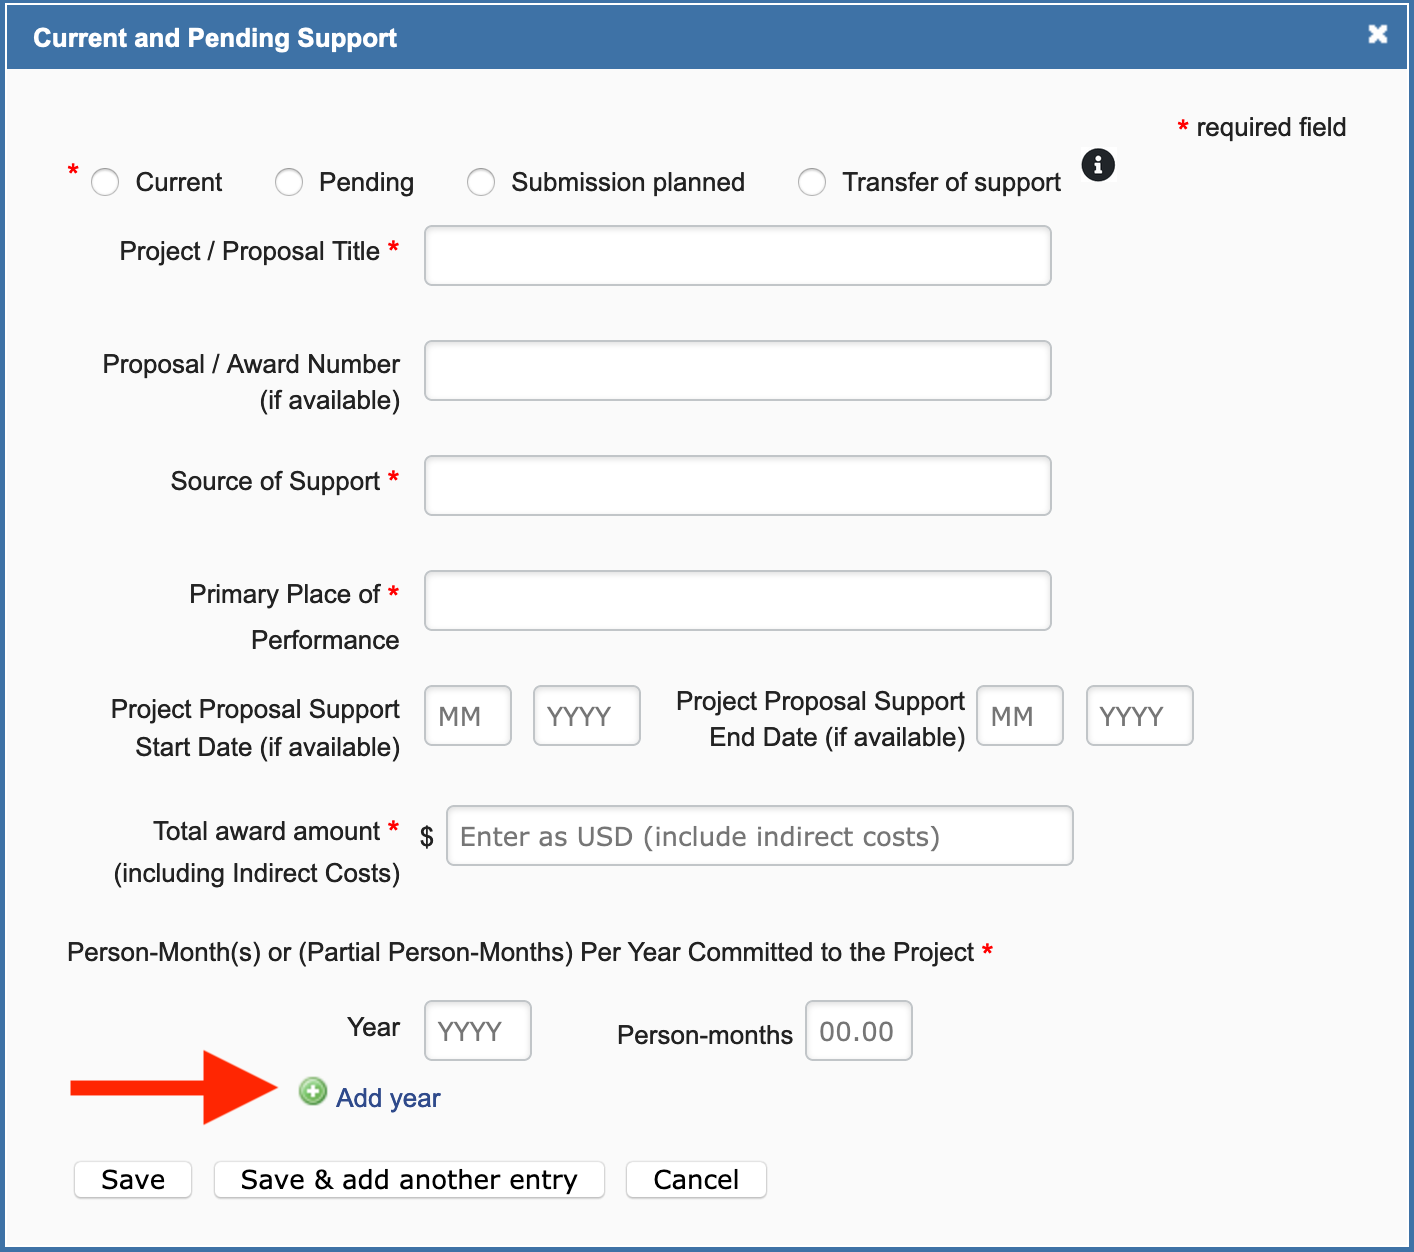
Figure 4: Add Project/Proposal to Current and Pending Support
Add In-Kind contributions (see Figure 5) to your Current and Pending document by following the directions included in the module and keeping in mind information included on the NSF FAQs
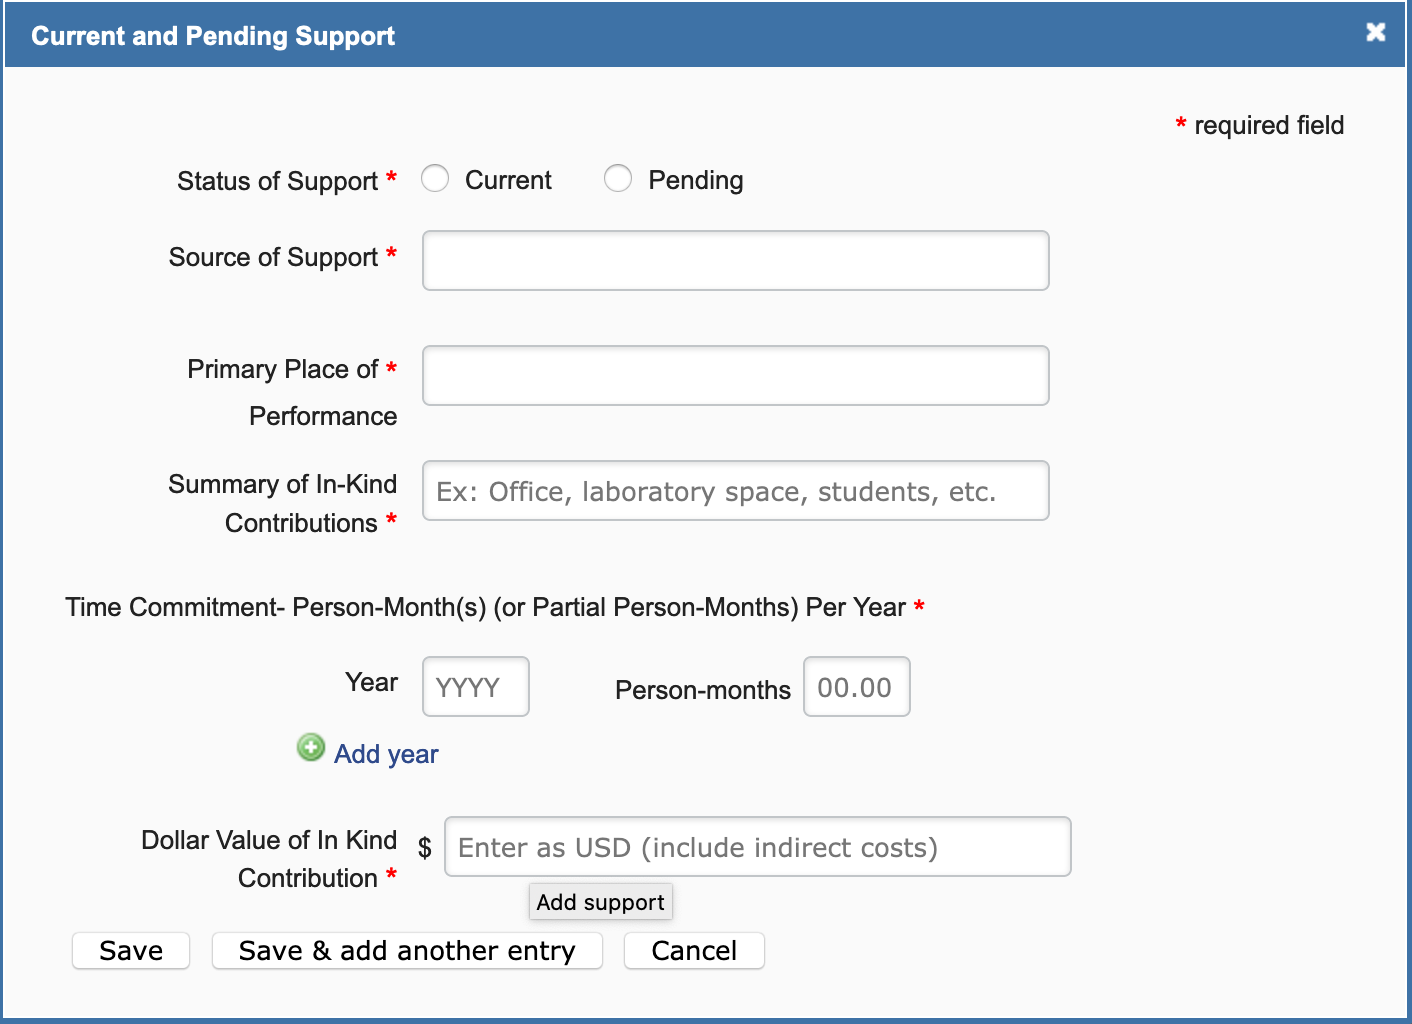
Figure 5: Add In-Kind Contributions to Current and Pending Support
Downloading Current & Pending Document PDF
When you are finished inputting all the necessary information into your current and pending document, download it by either clicking the PDF option at the top (see Figure 6) or the bottom of the formatting page.

